El Capitan Hike
Hike to Top of El Capitan– Yosemite
Alex Honnold took the Freerider Route to get to the top of El Capitan, a terrifying climb up a 3,000’ / 914m rock face that is sheer in the “easy” places and overhanging in the hard ones. As chronicled in the movie Free Solo, it took him 3 hours and 56 minutes to do so.
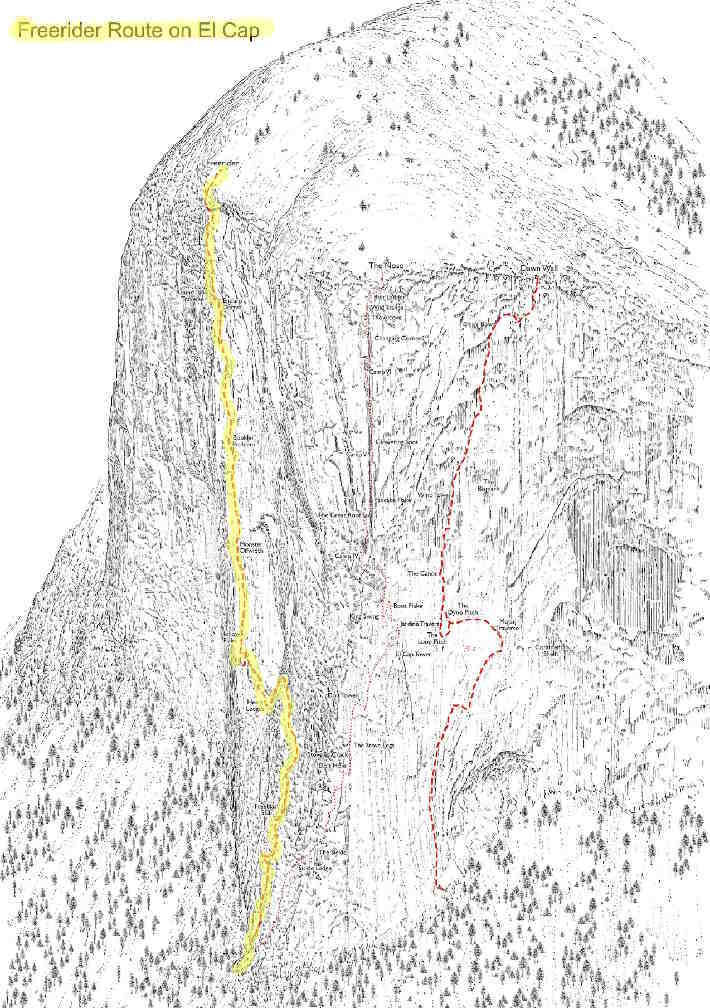
Not being a show-off, I got to the top of El Cap by a different route and crushed Alex’s time by getting the job done in 3:55:49. Admittedly, my route was less technical and involved no dangers whatever.
Choosing the Route
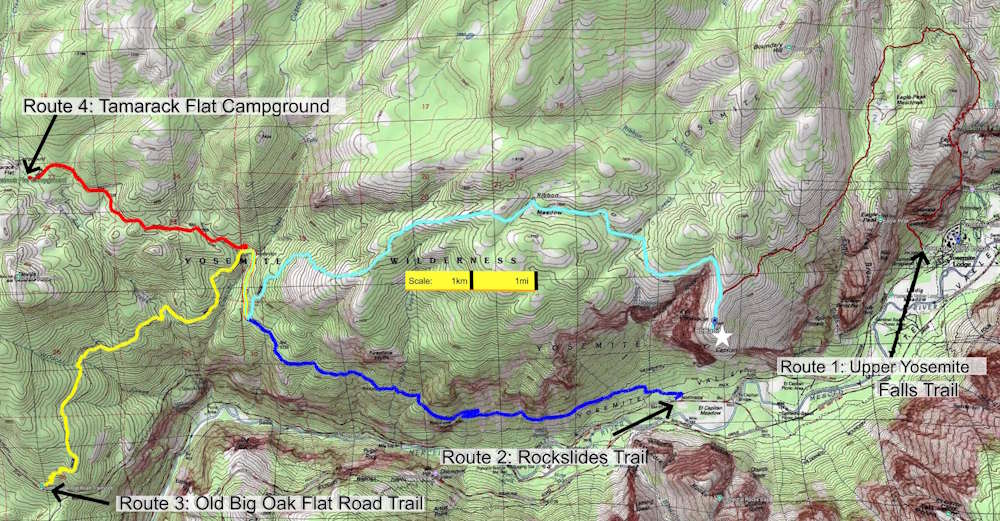
Before travelling to Yosemite I did some online research and found that there are four plausible routes for hikers to get to the El Cap summit. The vital statistics for each are as follows:
- Upper Yosemite Falls Trail to El Capitan Trail:
Length (round trip): 14.5 miles / 23.4 kilometers
Elevation at start: 4,021’ / 1,226m
Highest point: 7,613’ / 2,320m
Total uphill hiking: 6,546’ / 1,995m
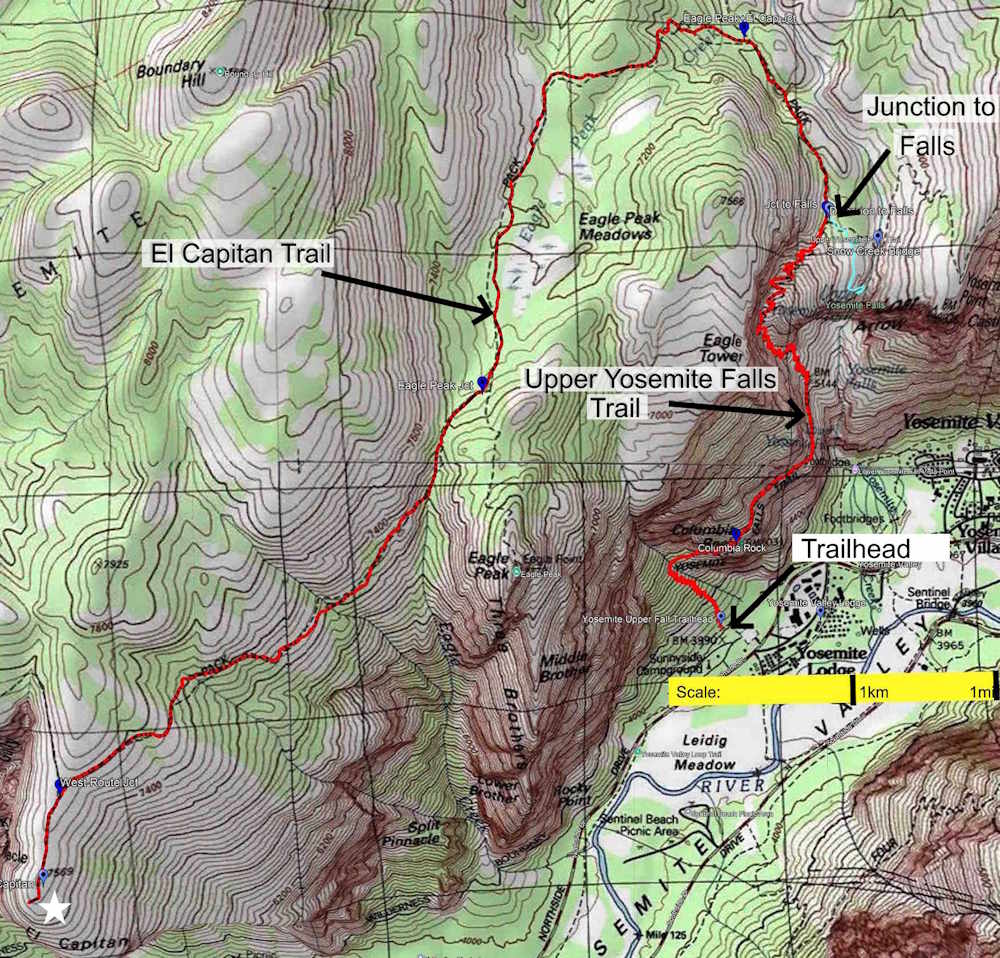
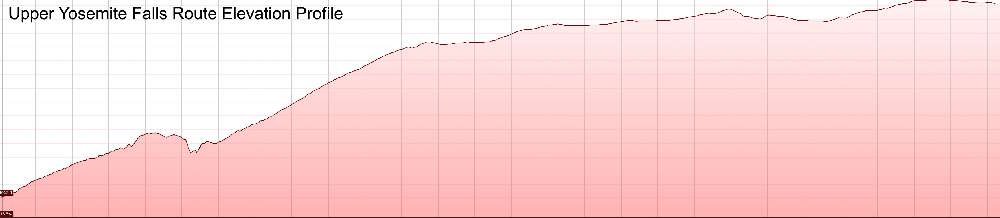
This is far-and-away the most popular route to the top of El Cap. It starts near Camp 4 on Northside Drive in the heart of the Yosemite Valley and is a logical choice for anyone staying overnight in the Valley. You will always have other hikers in sight on the 3 mile / 5 km Upper Yosemite Falls Trail because a short spur trail at its top leads to a stunning view of the Falls as they cascade off the edge of the precipice into the Valley below. This makes the Upper Yosemite Falls Trail one of the star attractions in the entire park.
The El Capitan Trail starts at the point where the spur trail to the Falls turns right. Here hiker traffic drops off considerably and the remaining 4.3 miles / 6.9 km to the summit are blissfully mellow compared to the relentlessly steep trek up on the Upper Falls Trail.
- Rockslides Trail to El Capitan Trail:
Length (round trip): 20.2 miles / 32.6 kilometers
Elevation at start: 3,960’ / 1,207m
Highest point: 7,731’ / 2,356m
Total uphill hiking: 6,596’ / 2,010m
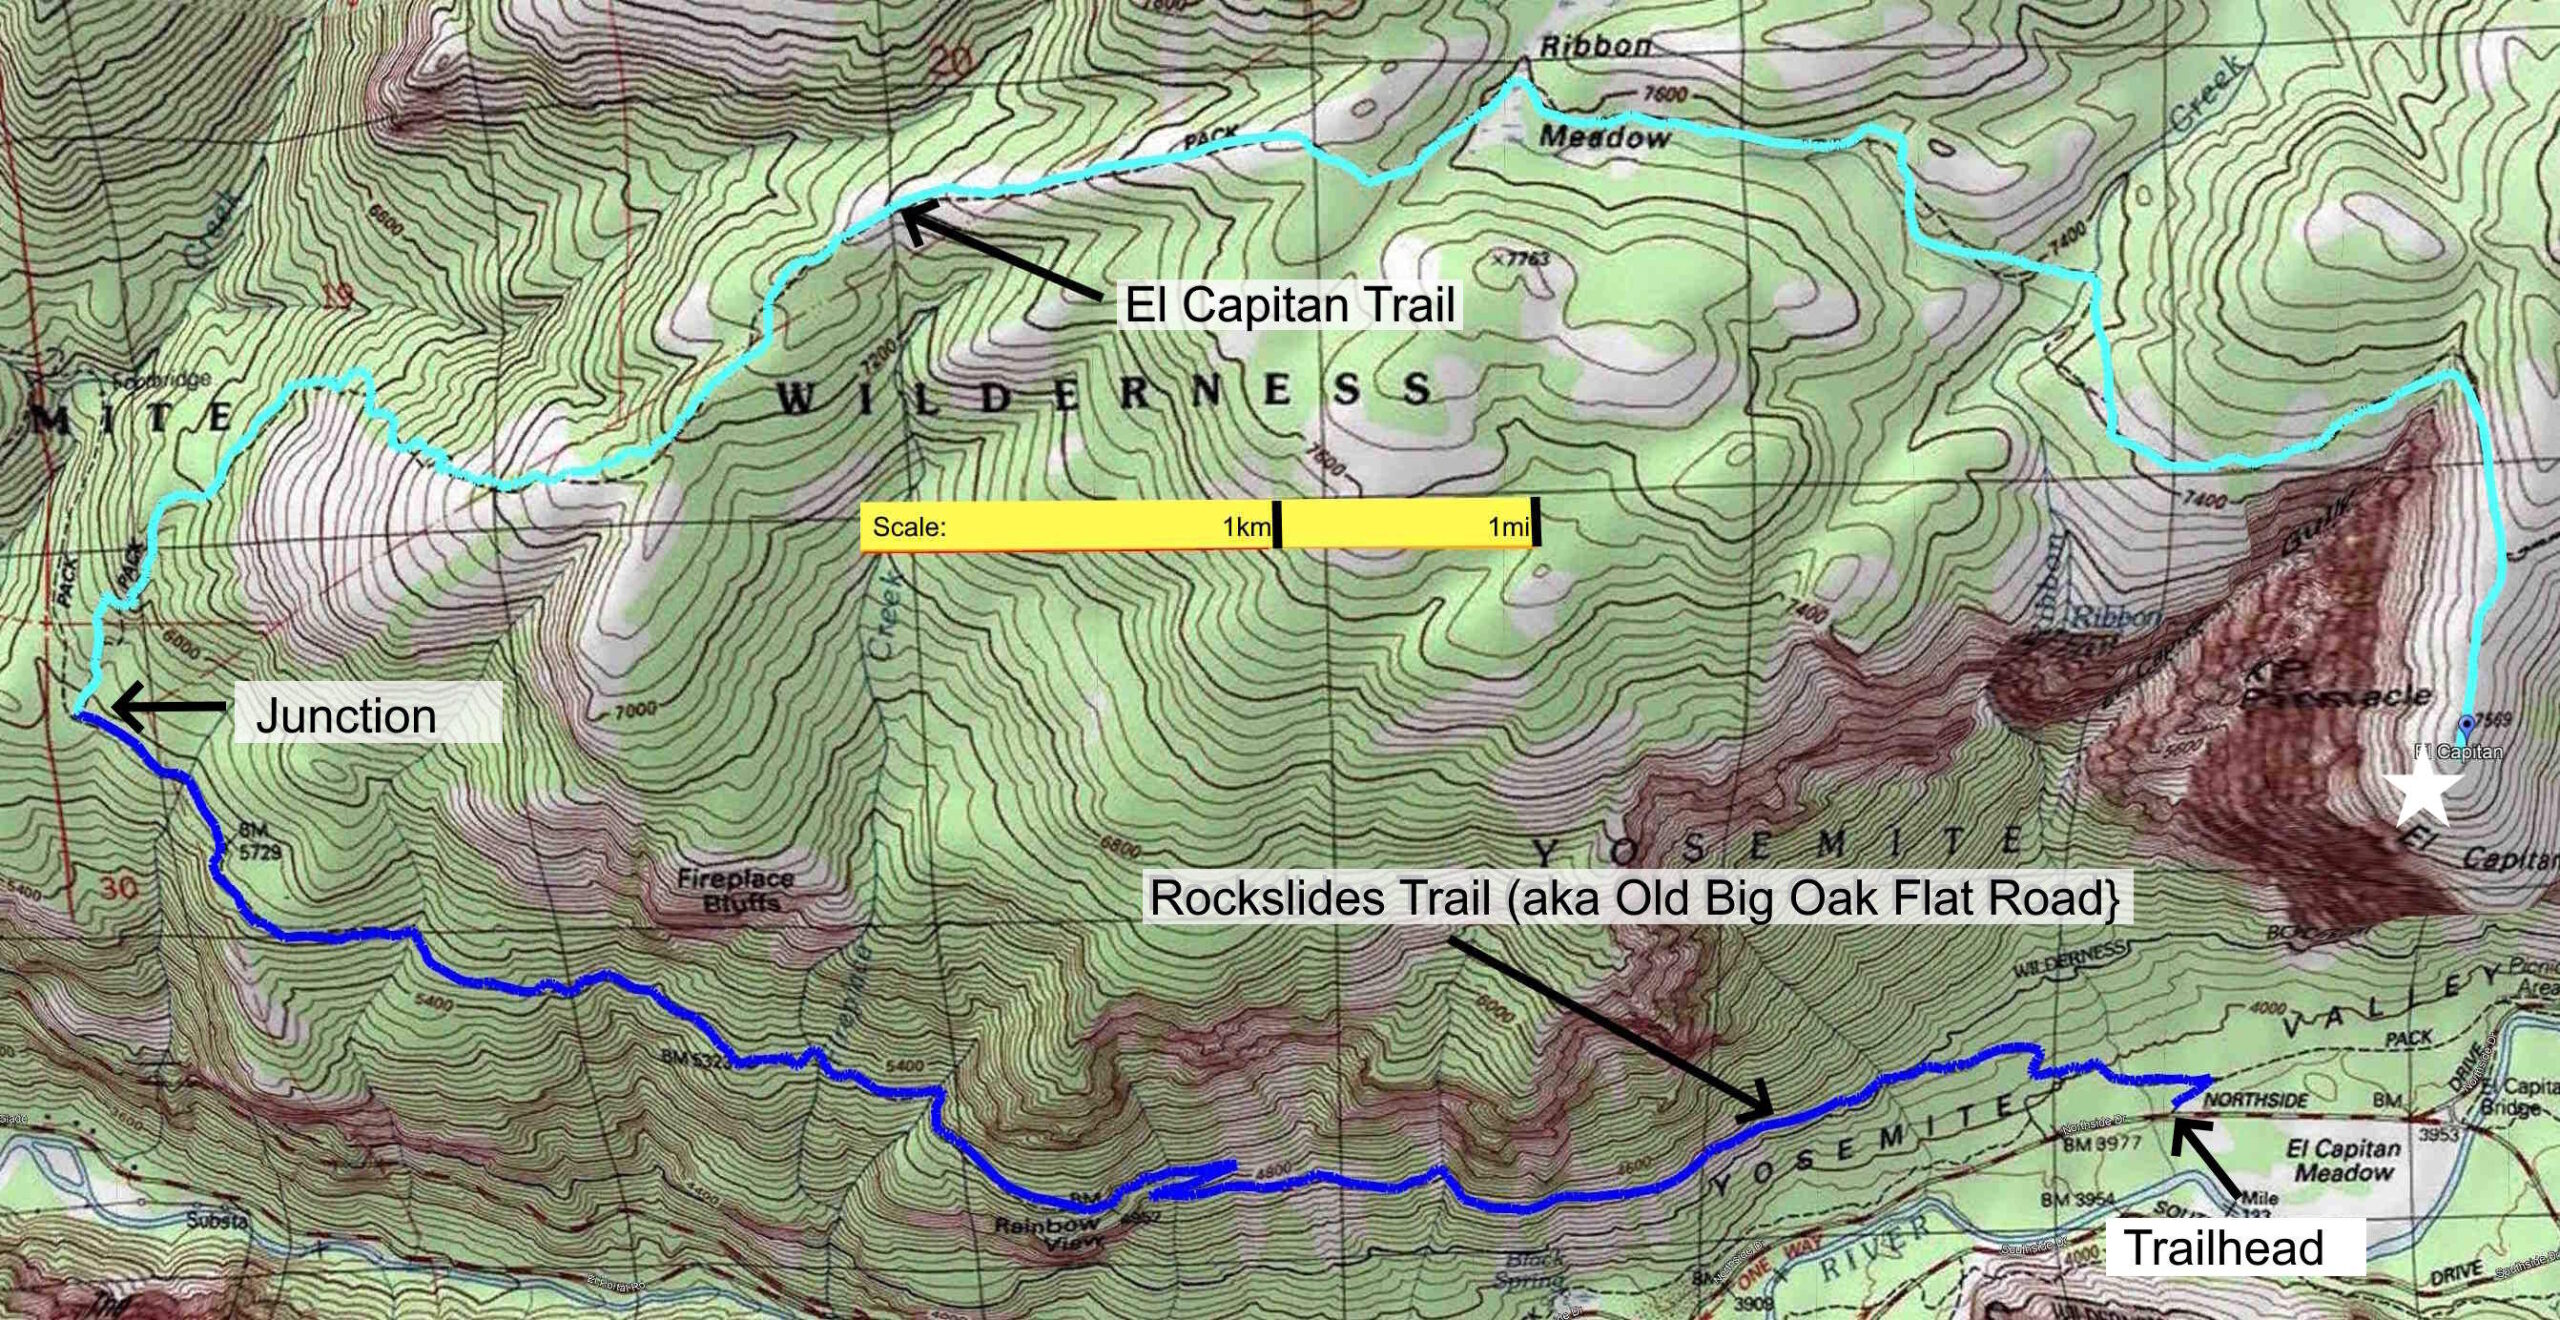
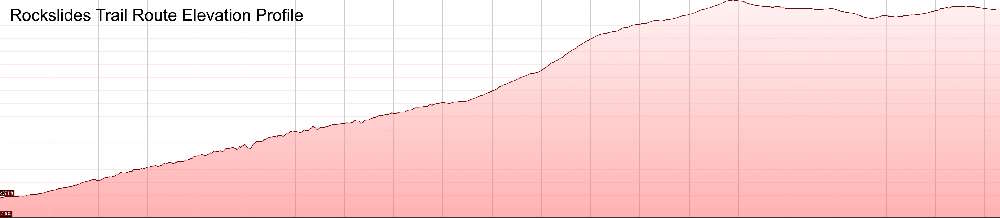
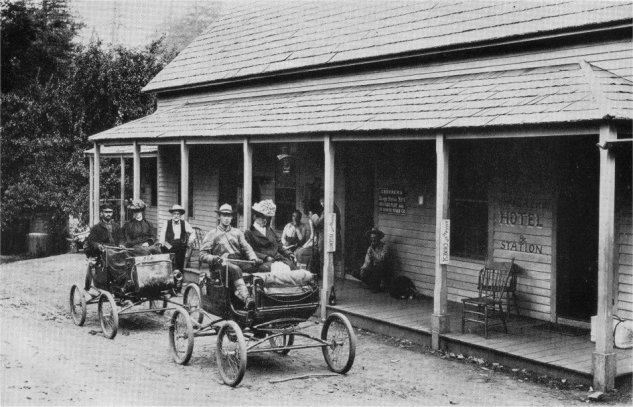
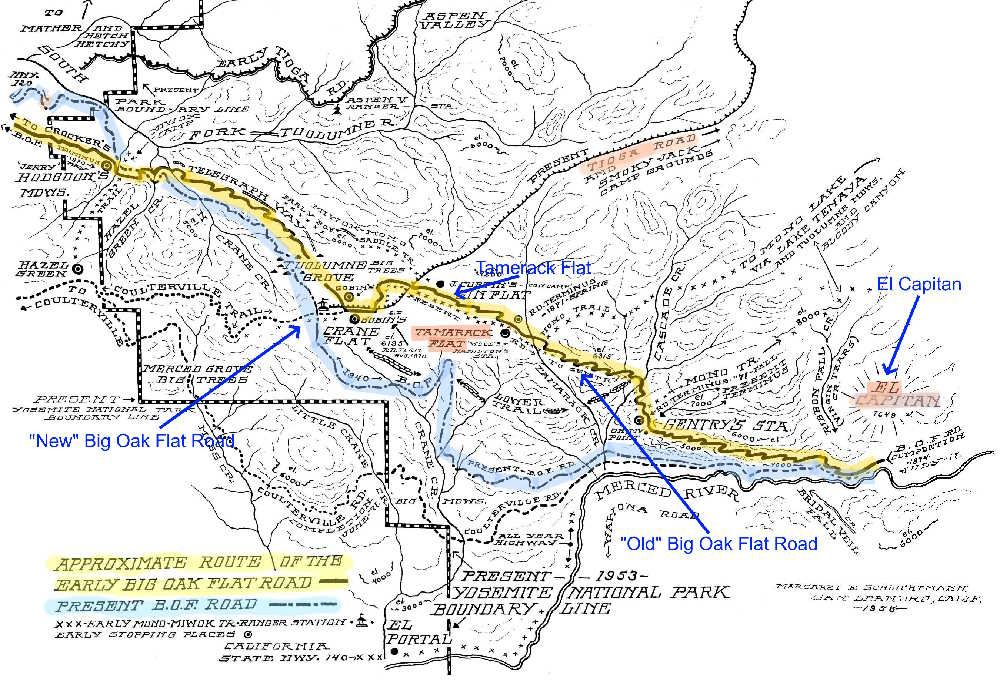
Although it is convenient for overnight visitors to the Yosemite Valley, this route seems to be the least used way to the summit of El Capitan. That is a shame because the Rockslides Trail follows the path of the historic Big Oak Flat Road all the way to its junction with the El Capitan Trail. On some maps the Rockslides Trail is still shown as “Old Big Oak Flat Road.” For over 75 years the original Big Oak Flat Road (not to be confused with its modern counterpart with the same name and CA Route 120) was the exclusive way by which visitors from San Francisco and other points west made their way into the Yosemite Valley. It was actively used until the 1930s when “New” Big Oak Flat Road with its tunnels and spectacular viewpoints was constructed. For history buffs who are up to the rigors of a very long day on the trail, it is a wonderful option. It is amazing that after nearly a century of disuse traces of the old asphalt roadbed are still visible. Anyone hiking on the Rockslides Trail will instantly appreciate what a white-knuckle journey an automobile trip into or out of the Valley must have been in the old days.
- Old Big Oak Flat Road Trail to El Capitan Trail:
Length (round trip): 19.5 miles / 31.5 kilometers
Elevation at start: 4,864’ / 1,483m
Highest point: 7,731’ / 2,356m
Total uphill hiking: 5,461’ / 1,665m
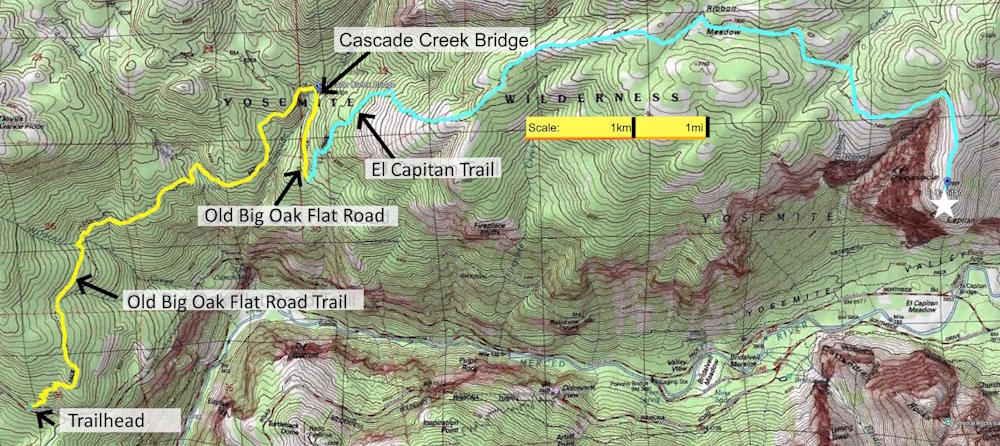
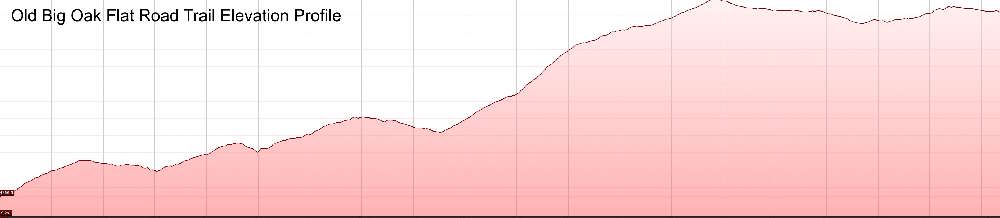
Despite its name, Old Big Oak Flat Road Trail has nothing to do with the original Big Oak Flat Road. Rather, it starts from a trailhead on the modern Big Oak Flat Road about 6 miles (10 km) east of Tioga Road while driving into the Yosemite Valley. The trailhead is marked and there is a small parking lot on the opposite side of the road.
From the trailhead the route ascends about 1,150’ / 351m over the course of 3.8 miles / 6.1 km until it meets Old Big Oak Flat Road just short of the bridge over Cascade Creek. Note that the trail named “Old Big Oak Flat Road” is different from “Old Big Oak Flat Road Trail”! In any event, after reaching Old Big Oak Flat Road hikers will bear right to go over the Cascade Creek Bridge and go a further .6mi / 1km until the junction with the El Capitan Trail. This is also the point where the Rockslides Trail intersects with the El Capitan Trail. From here the summit of El Cap is a rigorous 5.3 miles / 8.3 km away.
- Tamarack Flat Campground Route:
Length (round trip): 17.4 miles / 28.1 kilometers
Elevation at start: 6,343’ / 1,933m
Highest point: 7,731’ / 2,356m
Total uphill hiking: 4,338’ / 1,292m
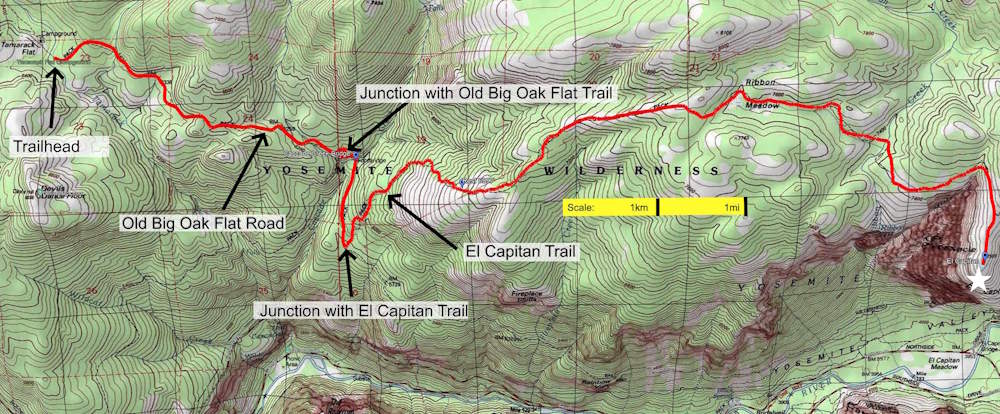
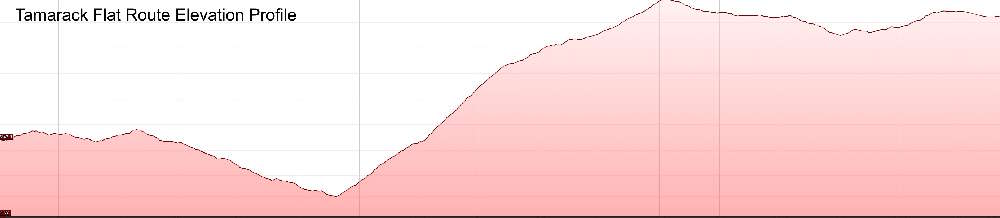
The Tamarack Flat Campground is the starting point for this route to the top of El Cap. Visitors from points west who enter Yosemite National Park through the Big Oak Flat Gateway on CA Route120 can get to it by driving a further 8 miles / 13 km to the junction with Tioga Road, turning left and proceeding a twisty 4 miles / 7 km further to the Campground entrance road. This last 3 mile / 5km stretch on the entrance road follows the path of the historic Big Oak Flat Road and ends at a parking lot for day hikers and access trails to 52 very nice campsites.
The trek to El Cap starts at a well-marked trailhead for Old Big Oak Flat Road and in the first 2.8 miles / 4.5 km the trail rises then drops 653’ / 199m until it meets the junction with the El Capitan Trail and Rockslides Trail. Lots of steep climbing lie ahead before reaching the El Capitan summit plateau.
One caution: Tamarack Flat Campground is seasonal. It generally opens mid-June and closes for the season mid-October. Similarly, Tioga Road is unplowed during the Winter and snow clearing is not started until April. It is usually closed from November through late May.
My Hike to the Top of El Capitan– October 7, 2026
I came to Yosemite with the firm intention of doing the hike on the standard Upper Yosemite Falls route. However, while driving to Yosemite from San Francisco International Airport I decided to drop by Tamarack Flat Campground and see what it was like. After all, the campground is only a few miles off the direct route into the Valley.
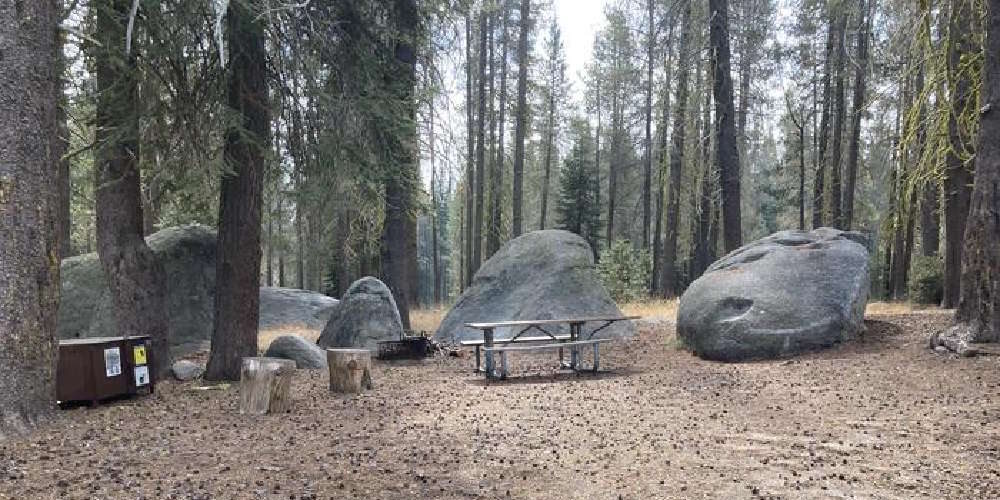
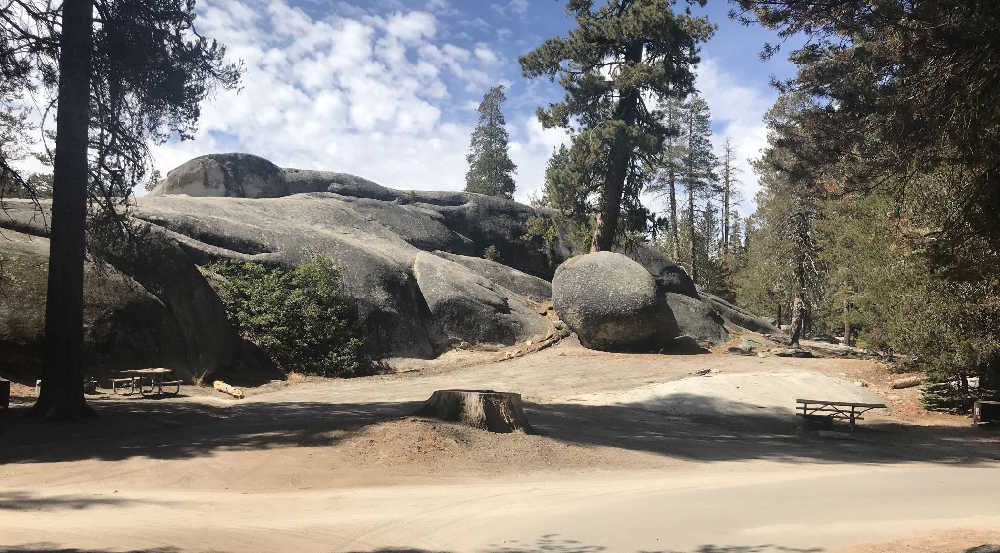
On arriving I was immediately smitten by the campground. It is spacious, flat and has a nice mixture of open areas and shady groves of trees. Best of all, some of the campsites are nestled among huge boulders (geologists call them “erratics”) that the ancient glaciers that created Yosemite left on their retreat millions of years ago. These smooth-sided giants, casually tossed aside by the stupendous power of moving ice, gave me a vivid sense of the geologic history of the Park. It is interesting that these more human-sized glacial vestiges convey an emotional impact greater than that of the infinitely bigger ones, El Capitan and Half Dome, that everyone comes to Yosemite to see. I decided on the spot to abandon my plan to use the Upper Yosemite Falls Trail and do the Tamarack Flat Route to the top of El Cap the next day.
Starting Out
After a comfortable night at the Yosemite Valley Lodge I drove back to Tamerack Flat in the pre-dawn hours. The drive covered 22 miles / 35 km and took about 45 minutes. I started the hike at 7:30am and honestly had no idea how long it would take. My guesstimate was 10 hours.
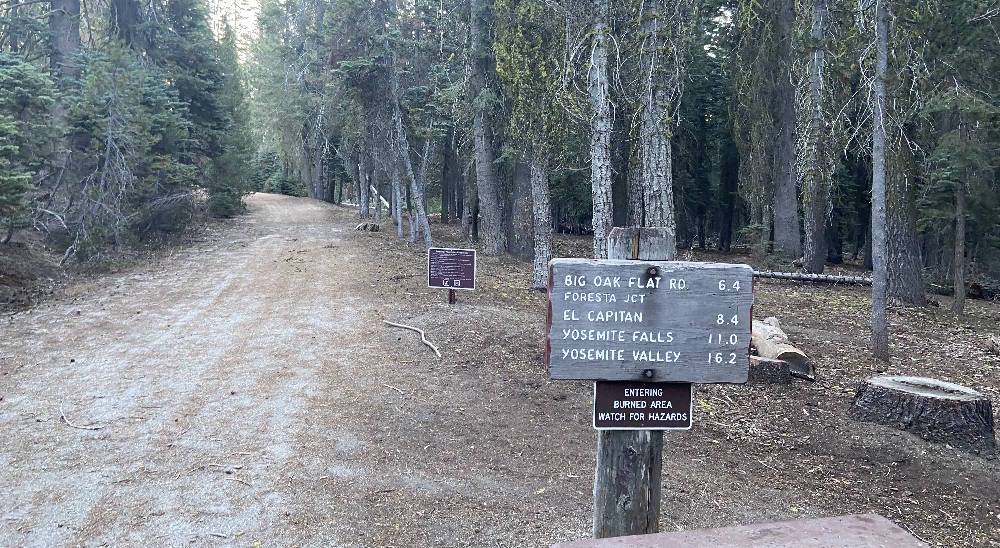
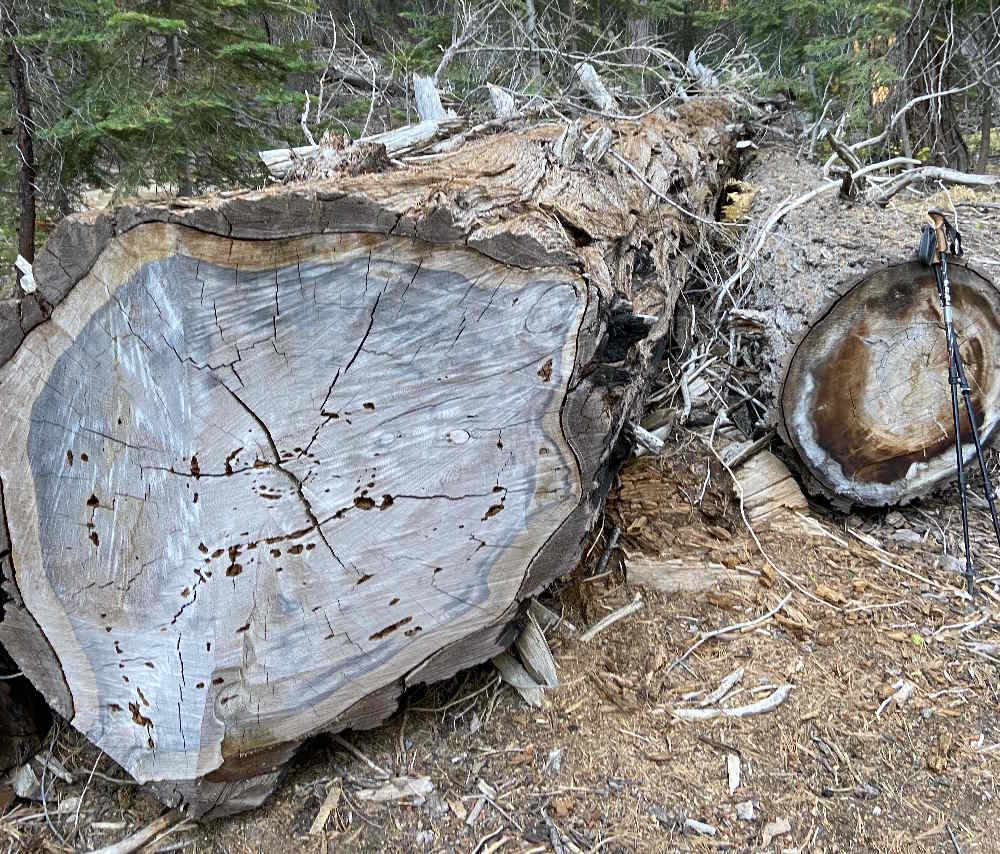
The day had dawned crisp and cool and it was truly a pleasure to begin the hike. I knew that the first mile or so would be over gently rolling terrain and used it to settle into a rhythm I knew I could maintain for hours on end. The quality of the trail is fantastic. Old Big Oak Flat Road was originally built to handle coachloads of tourists in mule-drawn wagons and was thoughtfully engineered. Its width was expanded to 13’ / 4m in the early days of automobile travel and at some point was paved with asphalt. Miraculously, enough of the old paving material is left to make the trail wonderfully solid underfoot. Huge fallen pines help mark the way.
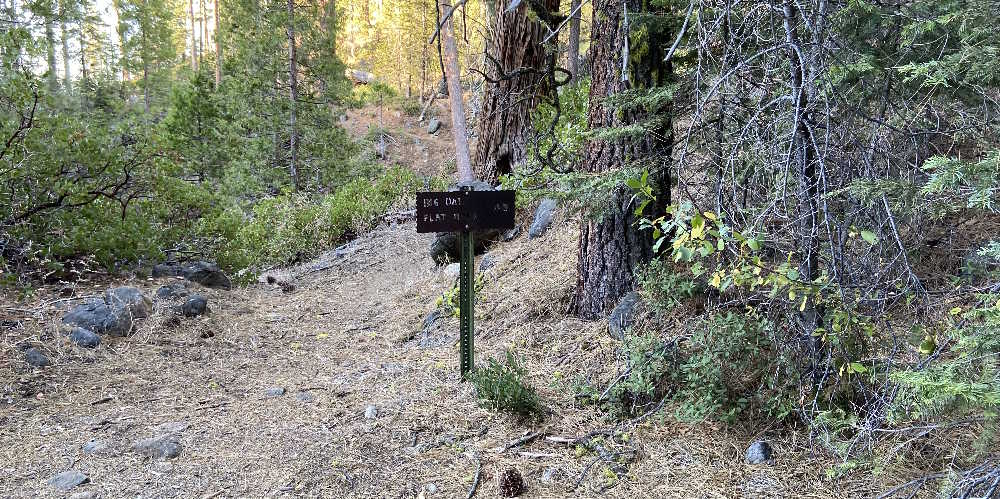
After the first mile the trail begins to descend sharply and at the 2.25 mile / 3.6 km mark has its junction with the Old Big Oak Flat Road Trail. The junction is marked with a sign proclaiming “Big Oak Flat Road 4.0”. That is a fairly accurate estimate of the distance to the trailhead on modern Big Oak Flat Road below.
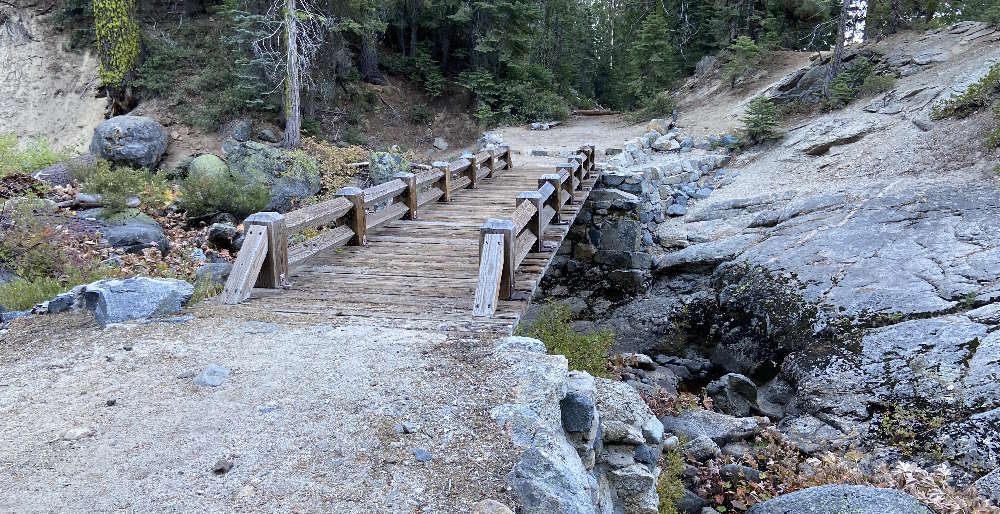
Shortly after reaching the junction, the beautiful Cascade Creek Bridge comes into view.
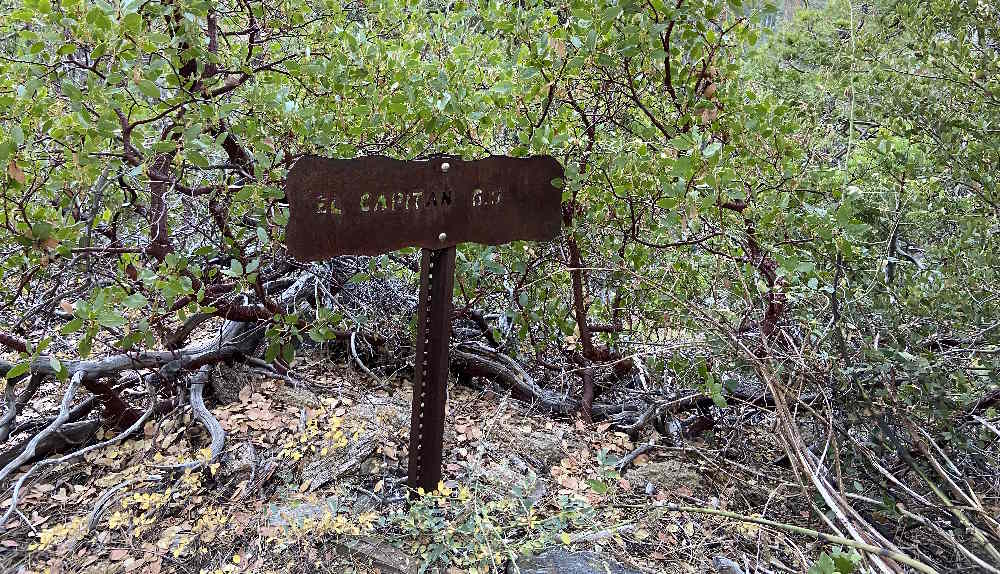
After the bridge the trail continues relentlessly down to the lowest elevation on the route, 5,799’ / 1768m, and at about 3 miles / 5 km meets up with the El Capitan Trail. The sign there says “El Capitan 6.0”. Close by the junction with the Rockslides Trail can also be seen.
Ascending the El Capitan Trail
This is where the going gets tough. You leave behind the broad, downward tilting slopes of Old Big Oak Flat Road and enter a narrow, rock-strewn defile that goes relentlessly uphill for the next 3 miles / 5 km until it reaches your high point of the day at 7,731’ / 2,356m. When you get to the top you will have ascended 1,932’ / 589m.
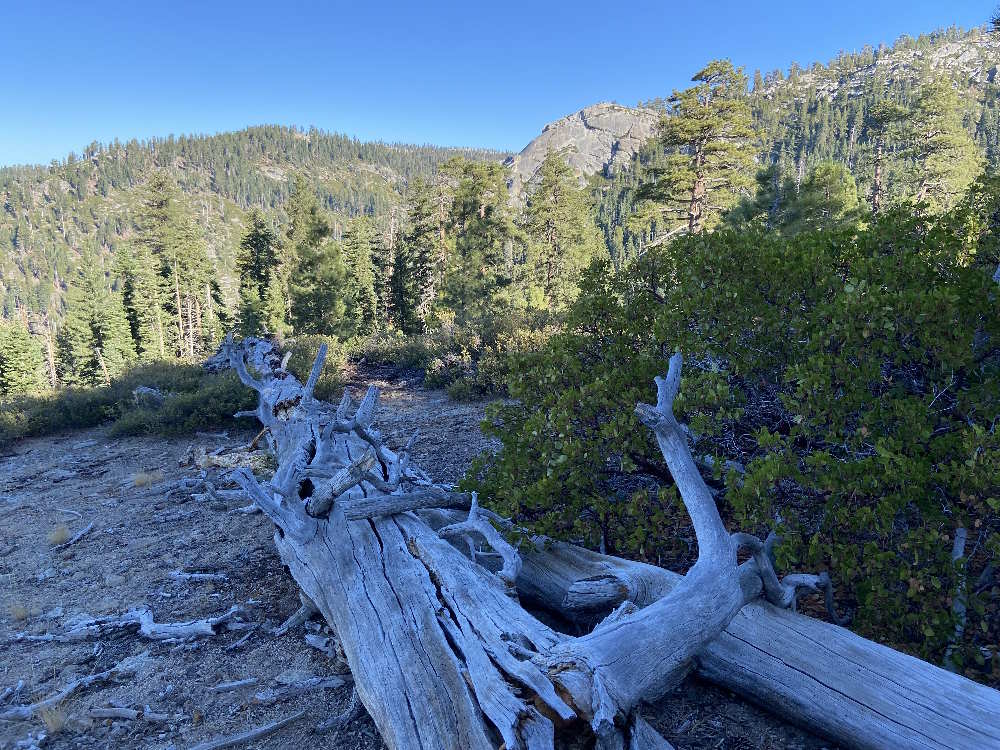
I broke the ascent into two pieces. At 1 hour and 50 minutes into the hike I took my first rest break of the day after covering a bit more than 4 miles / 7 km. I was about halfway up the hill at 6,940’ / 2,115m. Every inch of the way up I cursed the long downhill stretch on Old Big Oak Flat Road that had to be repaid by this ascent. However, on the plus side I was greatly encouraged about having emerged from the forest into more open terrain. From my resting spot on a beautifully weathered fallen tree I could look up to a ridgeline that I knew must eventually open to views of the Yosemite Valley below. I was also very happy about having had the foresight to upload a GPS track of the route onto my trusty Suunto Vertical watch before starting the hike. Navigation is a non-issue on Old Big Oak Flat Road but is tricky on the El Capitan Trail. The reason is that much of the route is over bare slabs of granite that offer no directional clues. It was infinitely reassuring to be able to look down at the map display on the watch and follow the marked line that defined the correct route. I zoomed the display to show the next 500’ / 152m of trail and found this ideal. The astonishing accuracy of modern GPS devices never fails to amaze me!
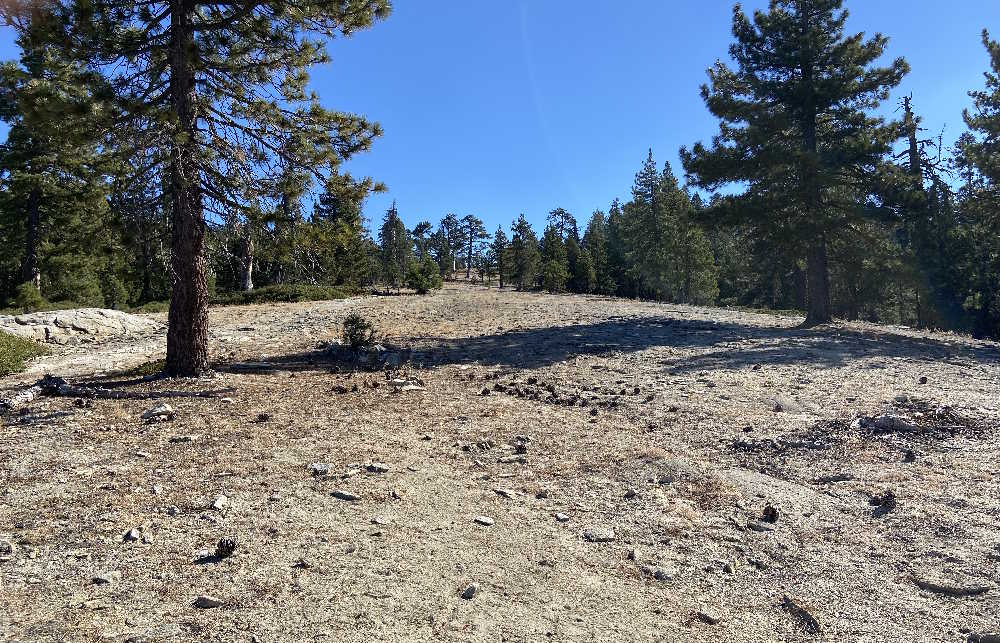
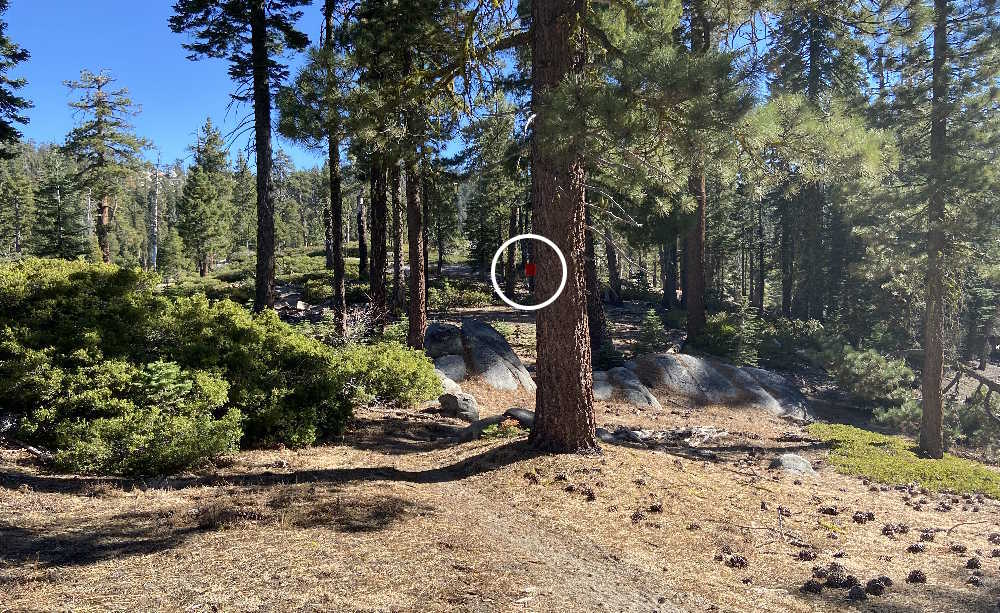
I felt great after my 15-minute rest break and was thrilled to be getting onto ground that increasingly showed evidence of being part of the giant granite El Cap massif. The route continued steadily upward until it reached a point where I could finally look ahead and see the end of the long uphill grind. Very cheering! Also cheering was the fact that trail markers started sporadically appearing on the route. It was almost startling to see them. The markers are small red metal squares nailed to trees along the way. While too widely-spaced to be of any practical value to the average hiker they provided welcome confirmation of the accuracy of my GPS track.
Easy Finishing Push to Summit
After my rest break, another 1.2 miles / 2 km of upward travel brought me to the highest point on the route, 7,731’ / 2,356m. By this time three quarters of the distance to El Cap had disappeared under my boots and I knew that it was just a gently rolling 3 miles / 5 km to the finish line. The trail continued through a mix of thin forest and rock slabs until it suddenly opened to a magnificent view of El Capitan boldly jutting out from the gully that defines its western edge. What a sight!
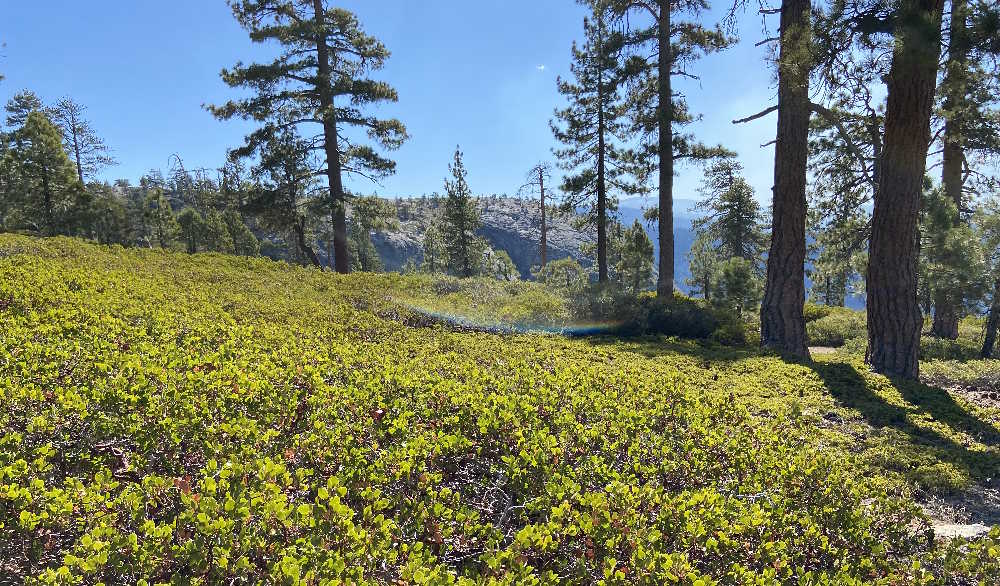
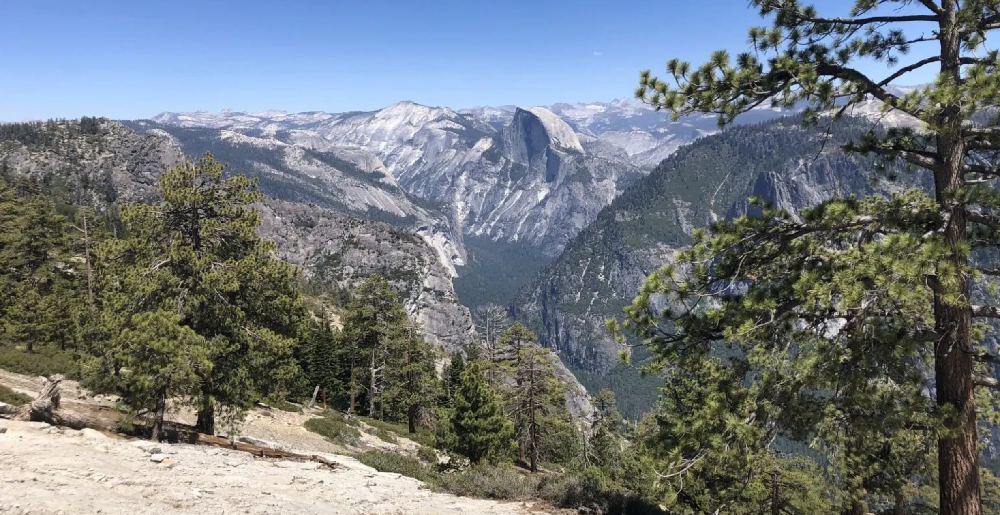
After this, the last mile to the summit was a breeze. The views get better-and-better and after skirting the edge of the gully, the huge rock crown of El Capitan reveals itself. It is amazing how many trees cling to the granite there! Once on El Cap, the eastward view reveals the Yosemite Valley and Half Dome in all its glory. I had climbed Half Dome on the cables route 22 years before and seeing it from this lofty eminence brought back a flood of good memories. I picked out a tree on the downward sloping crown and plopped down under it. I clicked “Stop” on my watch and was happy to see that I had reached the summit in a very respectable 3:55:49. During the entire journey I had not encountered a single person. On the summit itself I saw two guys lounging under another tree and one other fellow who was coming from the direction of Upper Yosemite Falls. Crowding on the trail is not a problem on the Tamerack Flat Route.
Back to Tamerack Flat Campground
After a brief rest under my tree I headed back down, confident that finishing the trek would be a trouble-free matter of putting one foot in front of the other.
Oh, blind optimism!
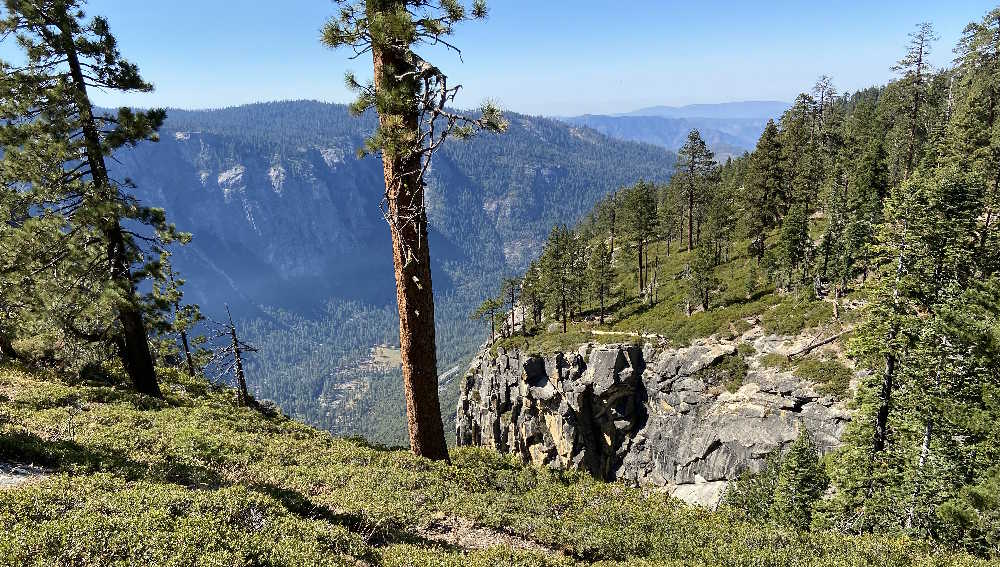
The trip down was much harder than expected. Somehow I had forgotten that the route is richly endowed with ups and downs and the “gently rolling” terrain back to the 7,731’ / 2,356m high point did not feel nearly so friendly as it did on the trek in. But, this obstacle past, I made my way back to my mid-hike resting place and stopped there again for a snack and some much-needed water. After a 10-minute break I descended the steepest section of the route and soon regained the welcome broad shoulders of Old Big Oak Flat Road.
That is where the real work began because from there the trail rises 653’ / 199m over the course of the next 1.6 miles / 2.6 km. Everybody hates an uphill finish and I plodded upward detesting every step of the way. It struck me forcibly that in these modern times the only people who have any appreciation for how far a mile really is are hikers and runners. After finally topping this character-building stretch, I met a group of six National Parks Service rangers-in-training who were having their own ordeal of sawing into pieces a huge fallen pine. Under the watchful eye of a senior Ranger they were taking turns manning an 8-foot-long bucking saw to get the job done. Hard work! Exchanging greetings, one of the crew asked me whether I was coming down from El Cap. I proudly answered “Yes!” and was rewarded with a smile and a thumbs-up.
Conclusion
No matter which route you choose, getting to the top of El Cap is an enormous thrill. The views are from another, better world and the very hard work it takes to get there makes the experience priceless. By any objective measure, the Tamerack Flat Route is the easiest way to get to the top of El Capitan. However, “easiest” does not mean “easy.” It will be a long day on the trail for anyone.
Having completed the route, I have two recommendations:
- Rather than overnighting in the Valley, camp at the Tamerack Flat Campground instead. Although the highest altitude on the route is modest, sleeping at 6,340’ / 1,932m rather than the much lower elevation in the Valley will provide acclimatization benefits that will make the hike feel hugely more comfortable, particularly for those who, like me, are coming from sea level locales.
- Carry a GPS with the route loaded into it. The El Capitan Trail is not particularly complicated but there were at least a dozen times during my hike when I was grateful to be able to look down at the track display on my watch and solve the riddle of which way to go next. It is no fun to get lost or to waste steps on a long hike. Having a GPS track is great for your mental health while on any route.
Now, as Nike says, “Just do it!”